Boat Project
With the Red Falcons : (Scott C, Alex D, Kevin H)
Materials:
Since we were restricted to only cardboard, duct tape and some glue, we used card board, duct tape and some glue. The cardboard was just recycled card board that we found laying around in the garage, most of them used to have some kind of product in it, for example a vacuum cleaner. The glue we used were Scotch glue sticks and some duct tape given to us by Mr. Zooks.


For making the project much easier, we used a box cutter and some scissors. The blade on the box cutter was kind of dull, so we mainly used the scissors for this project.


Problems that could have happened and our solutions.


Then we realized a boat needs walls, so, we made walls. We basically just cut the grey and white board to fix evenly within the brown board, then bend the sides of the brown board up to make the sides which are about 4 inches tall, (that's short, I know, we'll fix that).
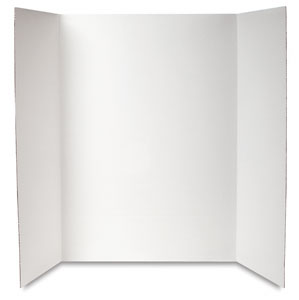
Because we couldn't bend the fourth wall up, we decided to take an old project board, which looks like the picture on the right, and cut off an end flap. We then took the end flap and taped it onto the side to get this result:
(it's in the back)

We reinforced the sides connecting the base to the sides in an "L" shape so that both the base and the sides are connected by one piece of duct tape.

Then we put duct tape on the edges of the cardboard to make it water proof in case water splashes in and ruins the cardboard.
Then, when we took a step back and looked at the boat, we all agreed that the boat walls were not going to cut it. They were way too short and water would easily be able to splash in. So we got some more old project boards and cut off the side panels; additionally we used the big piece by cutting it in half with on of the side panels as a template to cut it perfectly(mostly).

At the corners, you can see where we duct taped the boards together. We taped the panels on the outside of the boat because it was easier to put on, not quite sure if better for the boat in general, but better for our backs.

After applying all four walls that now are about 8 inches, we wanted the bottom to be safe from any water damage to the bottom of the boat. We taped it from the back to the front so the tape design looks like snake scales, we did this in hopes that the water would flow smoothly across the bottom by going over the flaps instead of meeting some small resistance by going against the flaps.
We then ran out of duct tape.
"Testing"
Possible inconsistent results might be that the boat has one side heavier than the other so it tilts in the water, the base might not be strong enough to support two of us, and the weight difference in the group could lead to different boat reactions.
We never tested because the group members' schedules. So, no results there. To test how strong our walls are, we leaned on them and they held up; at least we know those walls will hold.
Conclusion
Since I explained the whole process of the boat in the problems section of the blog, I will summarize the process of the boat:
We got a large piece of cardboard roughly 60 inches from diagonal to diagonal, cut it at the corner to lay it flat, then we folded it, which brings us back to step one. Next, we added another layer to the base, adjusted the size of the white/grey board so we could bring the sides of the brown board up, then brought the sides of the brown board up. We taped top sides of boat, the corners of the boats, and connected the base to the sides by using duct tape. Then we realized the sides were too short and we used the side panels of project boards to make the sides taller. Then we taped the entire bottom of the boat using a scale method to keep the base dry and to make the water flow better underneath the boat.
I also made an oar:

Fin
No comments:
Post a Comment